Data storage and transfer#
To run an actually useful compute job, you’ll need to get your data in and out of Picotte.
This section covers how and where to do that.
Storage on Picotte#
Picotte has two main storage locations, your home directory, or your research group’s shared directory.
Home directory
Your home directory is similar to your home directory on your personal computer: a place for you to keep your personal data, scripts, etc.
Everyone with a Picotte account has a home directory, located at
/home/{username}. So if your username is bn23, your home directory is
/home/bn23 (You can also use the shortcut ~ to refer to your home
directory).
Your home directory is limited to 64GiB of data.
Your home directory is where your terminal starts when you open a new one.
Research group directory
Very similar to your home directory, except that it’s shared between all members
of your research group. Research group directories are located in /ifs/groups.
For example, if you’re part of Dr. Einstein’s research group, your group
directory would be /ifs/groups/einsteinGrp.
Each group gets 500GiB of storage for free, and can pay for more storage beyond this limit[1].
If you need to store more than 64GiB of data, or have data that other members of your group need to access, keep it in your research group directory.
The most important thing to know about both storage locations is that they shared between all Picotte nodes. This means if you create files in your home or group directory on the login node, they’ll be available on all compute nodes also, and vice-versa.
The way this works is that data is actually stored in a separate computer[2], and accessed by the login and compute over the network when you read or write data. This is called network-attached storage.
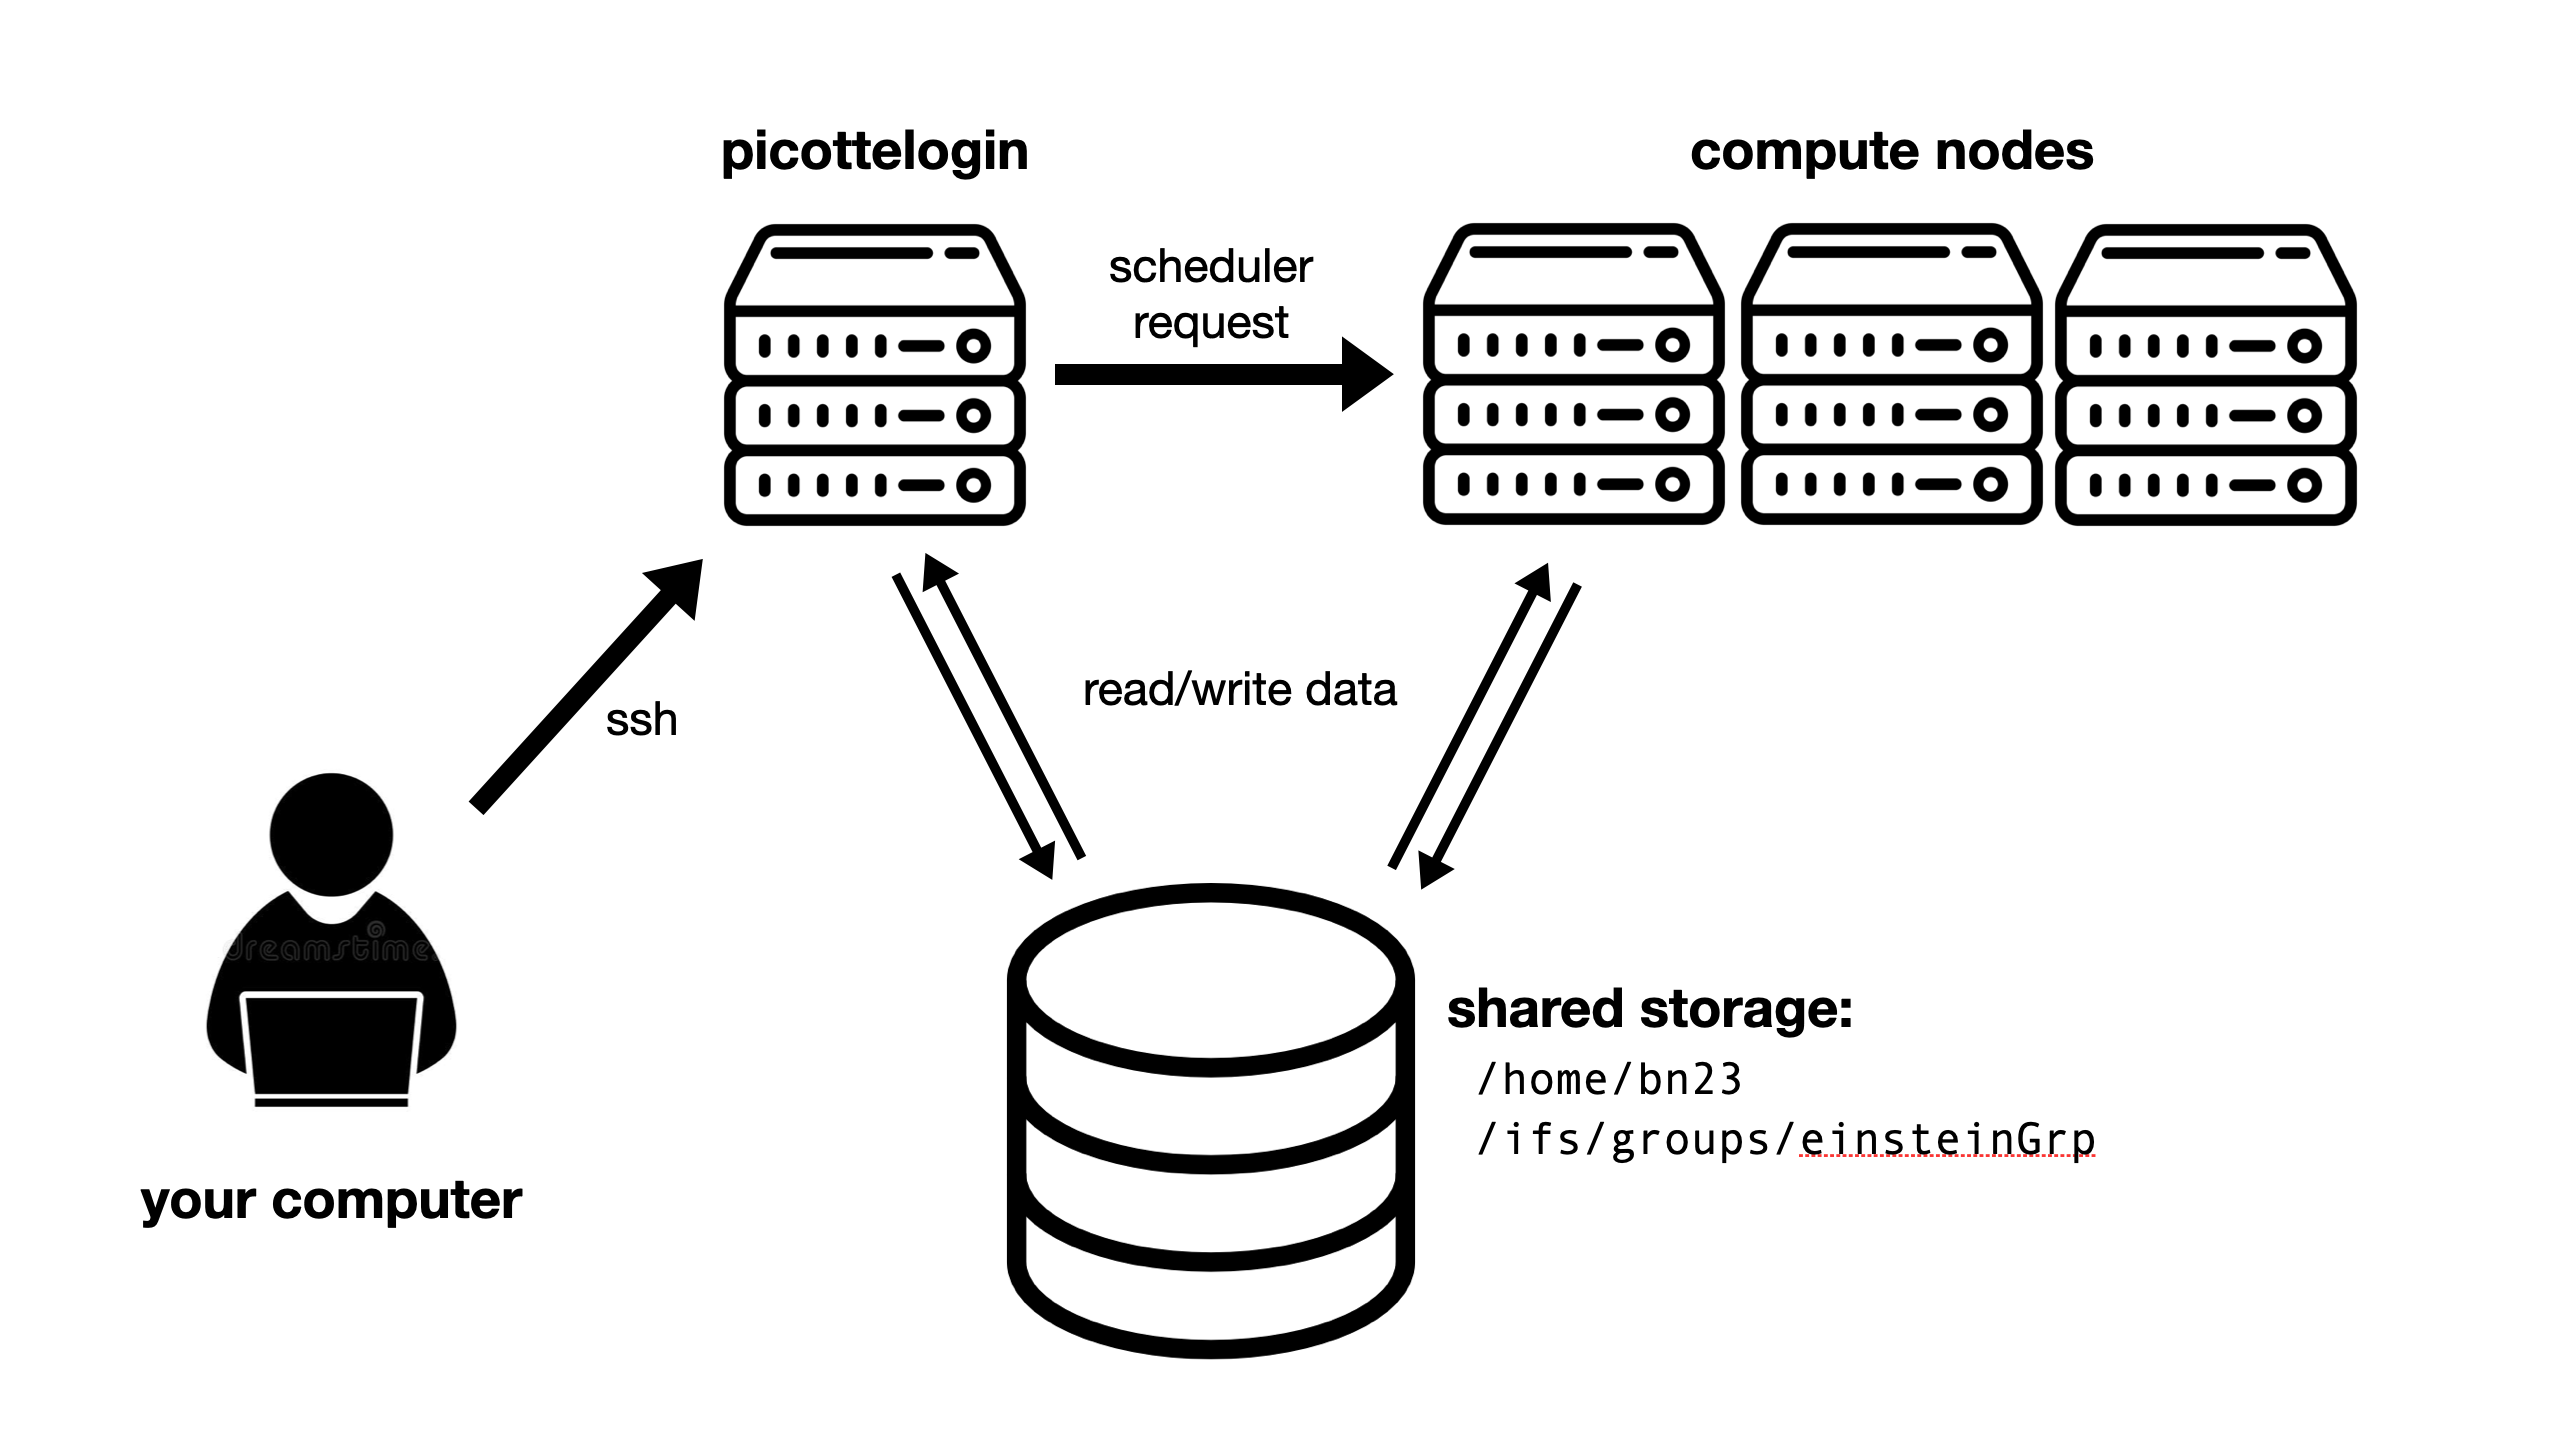
Fig. 8 Shared storage on Picotte: nodes read and write data over the network#
This is very useful: you can write code and scripts on the login node, and run them on the compute nodes without having to copy your code to the compute nodes. When your jobs running on the compute nodes produce results, you can easily examine them on the login node.
Scratch space#
Picotte also has scratch space for storing temporary files as part of a job’s execution. This is a more advanced topic than we’ll cover in this workshop, but you can read more in our documentation.
Transferring data to and from Picotte#
You can transfer files to and from Picotte using VSCode’s Explorer sidebar on the left side of the window.
First, you need to open your home directory. choose File → Open Folder from
the menu, then type /home/YOUR_PICOTTE_USERNAME (this might already be filled
in by default) and click OK.
You may be prompted to “trust the authors of the files in this folder”. Choose “Trust Folder & Continue” and then “Yes, I trust the authors” or similar options.
The Explorer sidebar on the left will now show the contents of your Picotte home directory.
Uploading files (local → Picotte)#
To upload files from your computer to Picotte, simply drag and drop them from your file manager (Finder, Windows Explorer, etc.) into the VSCode Explorer sidebar. The files will be uploaded to whichever folder you currently have open in VSCode.
Downloading files (Picotte → local)#
To download files from Picotte to your computer, right-click on a file in the Explorer sidebar and select “Download…”. You’ll be prompted to choose where to save it on your local machine.
Browsing other directories#
By default, VSCode shows the folder you opened when you connected. To browse a
different location (e.g. your research group directory), click File → Open
Folder and type the path, such as /ifs/groups/einsteinGrp.